
Spring roll success depends on understanding the fundamental differences between wrapper types and applying precise preparation methods. I’ve discovered that wheat-based wrappers excel for fried, baked, or air-fried applications, while rice paper creates superior fresh summer rolls. Each variety demands its own approach to hydration, temperature control, and handling.
Key Takeaways
- Choose the right wrapper type: Wheat-based wrappers work best for fried, baked, or air-fried rolls and require thawing from frozen, while rice paper is ideal for fresh summer rolls and needs controlled hydration in 90°F-100°F water for 15–20 seconds.
- Control filling temperature and moisture: Always cool cooked filling to room temperature and remove excess moisture by patting dry or salting vegetables, as hot or wet filling creates steam that makes wrappers doughy and prone to tearing.
- Follow proper portioning guidelines: Use 2–3 tablespoons of filling for standard 8-inch wrappers and 1/3 to 1/2 cup for larger 22cm rice paper, positioning filling 1.5 inches from the bottom corner in a compact horizontal log shape.
- Master the five-step rolling technique: Position wrapper as diamond, tuck bottom corner over filling and pull back to compact, fold side corners center with overlap, roll tightly, and seal with cornstarch slurry for wheat wrappers.
- Maintain optimal cooking temperatures: Fry at 350°F–375°F, bake or air fry at 400°F, and remember that tightly rolled spring rolls absorb 40% less oil than loose rolls during cooking.
Understanding Wrapper Types and Selection
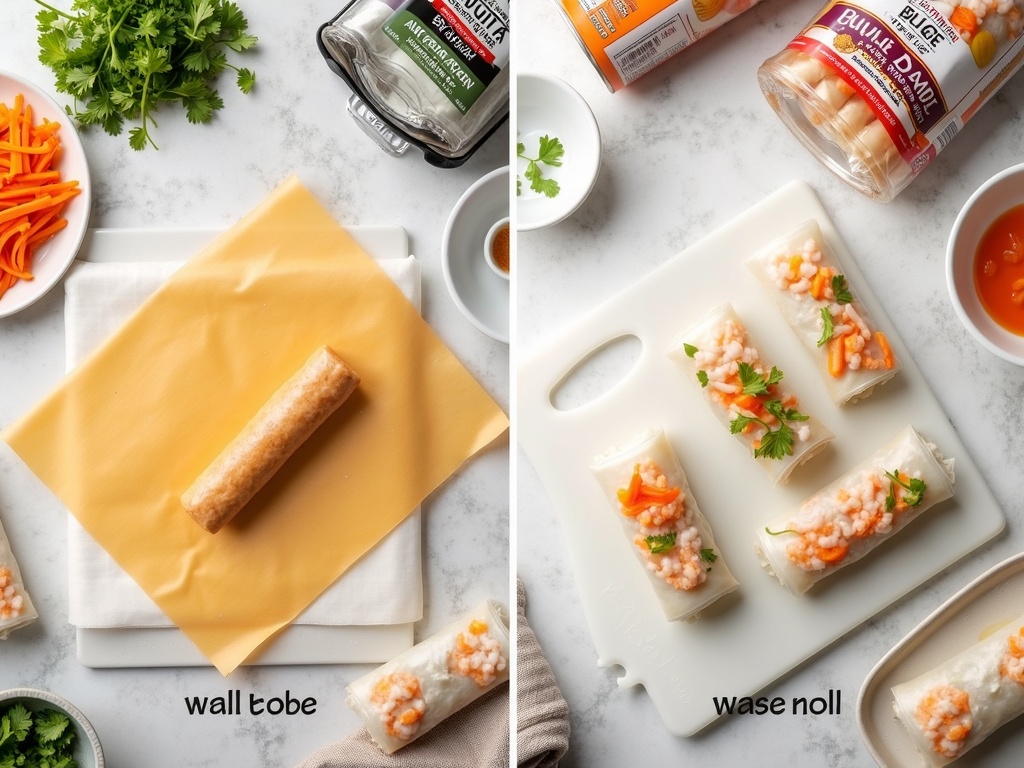
I choose between wheat-based wrappers and rice paper based on my intended preparation method. Wheat spring roll wrappers come frozen and require complete thawing before use. I thaw them in the refrigerator overnight or at room temperature for 2–3 hours. These wrappers contain gluten, which provides elasticity and strength during frying or baking.
Rice paper wrappers arrive dry and brittle. I hydrate them in warm water immediately before use. The rice base creates a translucent appearance that showcases colorful fillings perfectly. Rice paper works exclusively for fresh applications since it becomes mushy when heated.
I store unopened wheat wrappers in the freezer for up to six months. Once thawed, I use them within 2–3 days and keep them covered with a damp towel to prevent drying. Rice paper keeps indefinitely in a cool, dry place.
Preparation Fundamentals
Temperature control creates the foundation for successful spring rolls. I cool all cooked ingredients to room temperature before assembly. Hot fillings generate steam that softens wrappers and causes tearing.
Moisture management prevents soggy wrappers and filling leakage. I pat vegetables dry with paper towels after washing. For items like cucumber or cabbage, I salt them lightly and drain for 15 minutes before patting dry. This removes excess water that would otherwise compromise wrapper integrity.
I prepare my workspace with all ingredients within easy reach. A clean, damp towel covers unused wheat wrappers. For rice paper, I set up a shallow bowl with 90°F–100°F water and have a flat, clean surface ready for assembly.
Rice Paper Hydration Technique
Perfect rice paper hydration requires precise timing and water temperature. I fill a wide, shallow bowl with water between 90°F–100°F. Water that’s too hot makes the paper overly soft and fragile. Cold water hydrates too slowly and unevenly.
I submerge one rice paper round completely for 15–20 seconds. The paper should feel pliable but still have slight firmness. Over-hydration creates a sticky, difficult-to-handle wrapper that tears easily. Under-hydration leaves brittle spots that crack during rolling.
After hydration, I immediately transfer the wrapper to my clean work surface. Rice paper continues softening after removal from water, so I work quickly during assembly. The wrapper should feel smooth and slightly tacky to the touch.
Wheat Wrapper Preparation
Wheat wrappers require gentle handling during thawing and separation. I separate frozen wrappers carefully to avoid tearing. If they stick together, I place them between damp towels for 10–15 minutes to loosen.
Room temperature wheat wrappers handle best. Cold wrappers crack easily, while overly warm ones become sticky. I keep unused wrappers covered with a barely damp cloth to maintain moisture without making them soggy.
Before rolling, I inspect each wrapper for tears or dry spots. Small tears can be patched by overlapping edges slightly during rolling. Severely damaged wrappers should be discarded to prevent filling leakage during cooking.
Filling Preparation and Portioning
Proper filling preparation starts with ingredient selection and preparation. I choose vegetables with low water content or prepare high-moisture items by salting and draining. Carrots, bell peppers, and cabbage work excellently when julienned thinly. Bean sprouts should be blanched briefly and drained thoroughly.
Protein components require complete cooking and cooling. I cook shrimp until just opaque, chicken until internal temperature reaches 165°F, and pork until well-done. All proteins get cooled to room temperature before use.
I portion fillings consistently for uniform results. Standard 8-inch wrappers accommodate 2–3 tablespoons of filling. Larger 22cm rice paper rounds hold 1/3 to 1/2 cup. Overfilling creates bulky rolls that tear during assembly or cooking. Under-filling produces loose, oil-absorbing rolls.
Professional Rolling Technique
I position wheat wrappers as diamonds with one corner pointing down. Rice paper works best as squares with edges parallel to work surface edges. This orientation creates the most efficient rolling pattern.
Filling placement begins 1.5 inches from the bottom corner for wheat wrappers or bottom edge for rice paper. I arrange filling in a compact horizontal log shape, leaving space on both sides for folding. The filling log should measure roughly 3–4 inches wide and 1 inch thick.
The rolling process follows five distinct steps:
- Fold the bottom corner or edge over the filling, pulling it snug against the ingredients.
- Grip the wrapper and filling together, pulling back slightly to compress everything.
- Fold the side corners or edges over the center with slight overlap.
- Continue rolling firmly away from yourself, keeping tension consistent.
- Seal the final edge with water for rice paper or cornstarch slurry for wheat wrappers.
Sealing Methods
Rice paper seals naturally when the final edge meets the rolled portion. The starch in hydrated rice paper creates adequate adhesion without additional binding agents. I press gently along the seam to ensure contact.
Wheat wrappers require active sealing since they don’t naturally stick. I create cornstarch slurry by mixing one tablespoon cornstarch with two tablespoons cold water. This mixture brushes onto the final rolling edge before completion. Egg wash also works but creates a more pronounced flavor.
I avoid using too much sealing agent, which creates thick, chewy spots. A thin, even application provides sufficient adhesion without affecting texture or taste.
Cooking Methods and Temperature Control
Frying produces the crispiest texture when oil temperature stays between 350°F–375°F. I use a thermometer to monitor temperature accurately. Oil that’s too cool creates greasy, oil-soaked rolls. Excessive heat burns exteriors before interiors warm through.
I fry spring rolls in small batches to maintain oil temperature. Fresh rolls need 3–4 minutes, turning once halfway through. Frozen rolls require 5–6 minutes with careful temperature monitoring to prevent burning.
Baking and air frying offer healthier alternatives. I set my oven to 400°F and bake for 15–20 minutes, turning once. Air fryers work at the same temperature for 12–15 minutes. I brush rolls lightly with oil before cooking to promote browning.
Troubleshooting Common Issues
Wrapper tearing usually results from over-hydration, overfilling, or rough handling. I hydrate rice paper for shorter periods and reduce filling quantities. Gentle movements during assembly prevent stress tears.
Excessive oil absorption occurs with loose rolling or incorrect oil temperature. Tightly rolled spring rolls absorb 40% less oil than loosely assembled ones. I maintain proper oil temperature and avoid overcrowding the pan.
Uneven cooking stems from inconsistent rolling tightness or varying roll sizes. I standardize my rolling technique and portion control to ensure uniform results. Proper temperature control also prevents hot spots and uneven browning.
Soggy bottoms develop when cooked rolls sit on oil-retaining surfaces. I drain fried rolls on wire racks rather than paper towels. This allows air circulation around the entire roll surface.
Storage and Make-Ahead Tips
Fresh rice paper rolls stay best when assembled close to serving time. I can prepare ingredients hours ahead but complete assembly within 30 minutes of serving. Assembled fresh rolls keep in the refrigerator for 2–3 hours when covered with damp paper towels.
Uncooked wheat wrapper rolls freeze excellently for up to three months. I place them on parchment-lined baking sheets, freeze until solid, then transfer to freezer bags. Frozen rolls cook directly from frozen with extended cooking times.
Cooked spring rolls reheat best in a 375°F oven for 8–10 minutes. This restores crispness better than microwave reheating, which creates soggy textures. Air fryers also work well for reheating at 350°F for 5–6 minutes.
Perfect spring rolls result from understanding each wrapper type’s unique characteristics and applying consistent technique. Practice with small batches builds confidence and muscle memory for efficient assembly. Temperature control during both preparation and cooking creates the final difference between amateur and professional results.
Spring Roll Wrappers: Types and Selection Guide
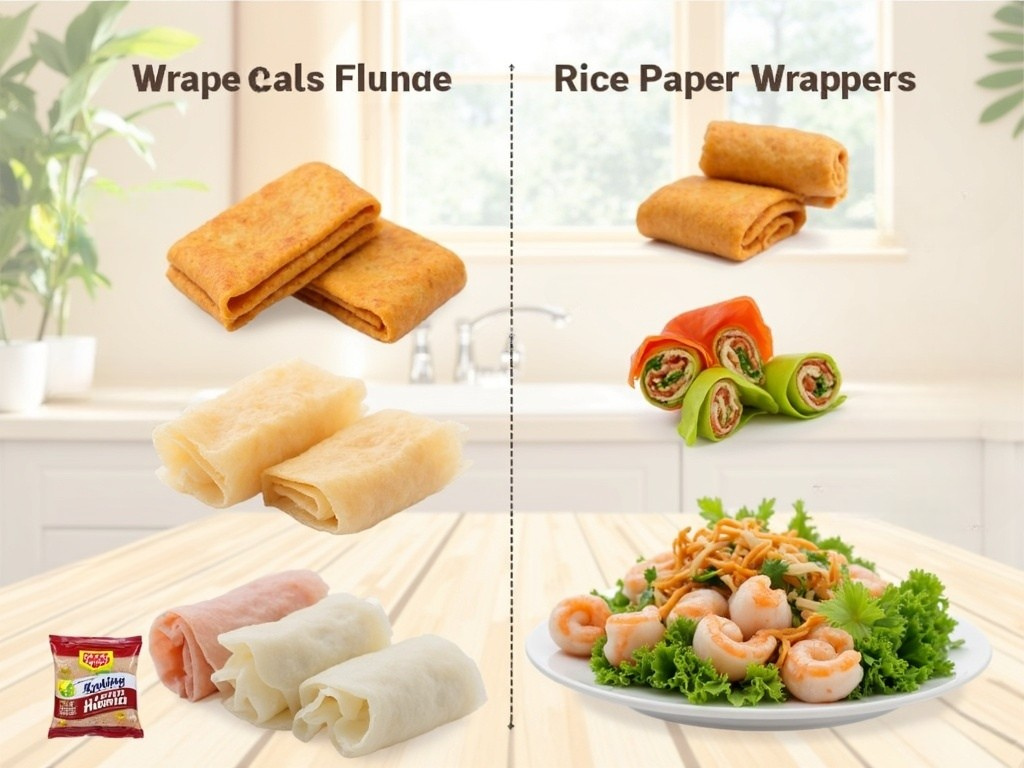
I often see confusion between different spring roll wrapper types, so let me break down the fundamental distinctions that will transform your cooking. Wheat-based wrappers serve fried, baked, or air-fried spring rolls, while rice paper wrappers are perfect for fresh, uncooked summer rolls.
Wheat-based wrappers contain wheat flour, water, salt, and oil, delivering approximately 55-70 calories per 8×8 inch wrapper. Rice paper, known as Bánh tráng, combines rice flour, water, salt, and sometimes tapioca starch, containing just 30-45 calories per 22cm wrapper. This caloric difference makes rice paper an excellent choice if you’re watching your intake.
Size Options and Key Differences
Wrapper sizes vary significantly based on type. Wheat-based varieties come in squares ranging from 6-inch to 10-inch, while rice paper arrives in rounds measuring 16cm to 22cm. I recommend choosing larger sizes for generous fillings and smaller ones for appetizer portions.
Here’s what sets each wrapper apart:
- Wheat wrappers create crispy, golden exteriors when cooked and handle robust fillings without breaking
- Rice paper offers translucent, chewy textures perfect for showcasing colorful ingredients
- Egg roll wrappers aren’t interchangeable with spring roll wrappers – they contain egg, are thicker, and produce bubbly, chewier textures when fried
Tapioca starch addition to rice paper increases elasticity by over 25%, making these wrappers more pliable and less prone to tearing during assembly. This enhancement proves invaluable when you’re making spring rolls with multiple ingredients.
Shopping for wrappers requires knowing where to look. Wheat-based varieties live in the freezer section and must be thawed before use, while rice paper sits shelf-stable in the dry goods aisle. I always keep both types on hand for different occasions.
For wheat-based wrappers, I recommend:
- Spring Home/TYJ
- Wei-Chuan
- Menlo
Rice paper enthusiasts should seek:
- Three Ladies Brand
- Rose Brand
- Star Anise Foods
Understanding these distinctions helps you explore creative ways to use spring roll wrappers beyond traditional applications. Whether you’re crafting crispy appetizers or fresh rice paper rolls, selecting the right wrapper type ensures your dishes achieve the intended texture and flavor profile.
Preparing Your Wrappers: The Essential First Steps
Proper wrapper preparation forms the foundation of successful spring roll making. I’ve found that taking time with this crucial step makes the difference between professional-looking rolls and frustrating failures.
Thawing and Handling Wheat Wrappers
Frozen wheat wrappers require careful thawing to maintain their flexibility. I recommend planning ahead and moving your wrappers from the freezer to the refrigerator 8–10 hours before use. For quicker preparation, you can thaw them on the counter for 45–60 minutes at room temperature.
Once you open the package, keep the wrappers covered with a damp cloth immediately. This prevents the edges from drying out and becoming brittle, which would make rolling nearly impossible. To separate frozen wheat wrappers effectively, wait until they’ve thawed completely. Then bend the stack gently to loosen the sheets before carefully peeling them apart one by one.
Rice Paper Hydration Technique
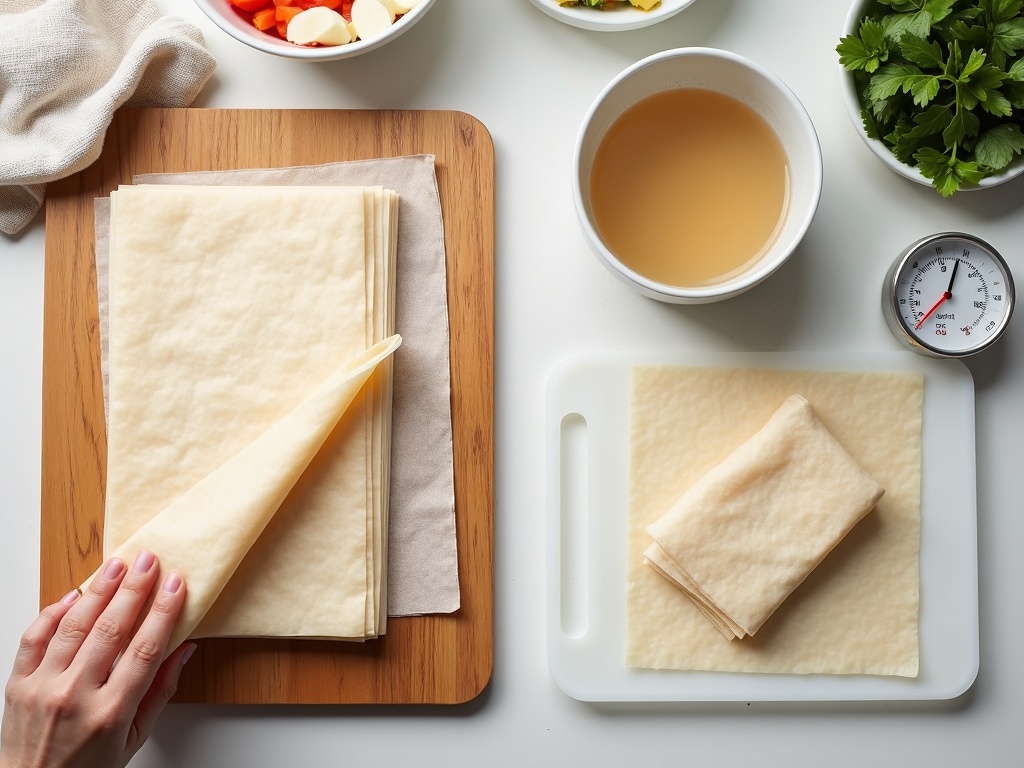
Rice paper requires a completely different approach that centers on controlled hydration. I use warm water heated to 90°F–100°F (32°C–38°C) for optimal results. Water that’s too hot will cook the wrapper, while cold water takes too long and increases handling time.
The hydration process follows these specific steps:
- Fill a shallow dish wider than your wrapper with 1–2 inches of warm water
- Submerge one sheet for exactly 15–20 seconds
- Remove and lay the wrapper on a damp work surface
- Allow 30–60 seconds for the softening process to complete
Over-soaking increases your tearing risk by 60%, so timing matters significantly. I’ve learned that rice paper continues softening even after removal from water due to the science behind starch gelatinization. The starches absorb water and continue this process, which means patience during the final softening stage prevents premature handling.
Your work surface choice impacts success rates dramatically. I prefer using either a damp clean towel or plastic cutting board for rice paper work. These surfaces prevent sticking while providing enough grip for easy handling. Wood surfaces tend to absorb moisture and can cause sticking issues.
Temperature control remains critical throughout the process. If your water cools down, refresh it with hot water to maintain the proper range. Cold water extends soaking time and can lead to uneven hydration, creating weak spots that tear during rolling.
For spring roll preparation, I always work with one wrapper at a time rather than preparing multiple sheets simultaneously. This prevents over-softening and maintains optimal texture for filling and rolling.
The key difference between wheat and rice wrappers lies in their response to moisture. Wheat wrappers need protection from drying out, while rice paper requires controlled rehydration. Understanding these fundamental differences helps you choose the right preparation method for your specific wrapper type.
I’ve discovered that creative wrapper applications often depend on proper preparation techniques. Whether you’re making traditional rolls or experimenting with new recipes, these foundational steps ensure consistent results.
Consistency in your preparation routine builds muscle memory and improves efficiency over time. Start with these proven techniques, then adjust timing and temperature based on your specific environment and wrapper brands. Different manufacturers may have slight variations in thickness and composition that affect hydration rates.
The investment in proper preparation pays dividends in easier rolling, better presentation, and fewer torn wrappers. I’ve found that rushing this stage almost always leads to frustration and wasted ingredients, while patience here creates the perfect foundation for delicious rice paper rolls and wheat wrapper creations alike.
Perfect Filling Techniques for Foolproof Spring Rolls
Temperature control stands as the most critical factor when preparing your spring roll filling. I always test the filling with the back of my hand—it should feel room temperature or cooler before you begin rolling. Hot filling creates steam that transforms the wrapper into a doughy mess and causes tears that ruin your careful work.
Moisture management requires equal attention to temperature. I squeeze excess moisture from vegetables using clean kitchen towels or paper towels, then pat proteins completely dry. For cabbage-heavy fillings, I salt the shredded pieces and let them sit for 20 minutes, which draws out up to 30% of their water weight. This simple technique prevents soggy wrappers and oil splatter during frying.
Uniform chopping makes rolling significantly easier and improves the final texture. I mince or small dice all ingredients to roughly the same size, ensuring consistent bites and preventing sharp edges from puncturing the delicate wrapper. Large chunks create uneven shapes that tear through the wrapper during rolling or cooking.
Proper Portioning and Cooling Methods
Portion control prevents overstuffing, which leads to burst wrappers and messy preparation. I use these guidelines for optimal results:
- 2-3 tablespoons of filling for standard 8-inch wrappers
- 1/3 to 1/2 cup for larger 22cm rice paper wrappers
- Always err on the side of less rather than more filling
Cooling techniques speed up the process while removing unwanted moisture. I spread cooked filling in a thin layer on a baking sheet, which allows faster cooling and lets moisture evaporate naturally. This method prevents the steam buildup that occurs when hot filling meets the wrapper, eliminating the doughy texture that makes spring roll preparation frustrating.
Excess moisture transforms into steam during cooking, causing wrappers to burst and creating greasy, unappetizing results. I’ve learned that taking time to properly cool and dry filling saves hours of frustration later. The extra preparation ensures your spring roll wrappers maintain their integrity throughout the rolling and cooking process.
Once you master these filling techniques, you’ll find that rice paper rolls and other wrapper varieties become much more manageable. Proper temperature and moisture control creates the foundation for professional-quality results every time.
https://www.youtube.com/watch?v=f8XLC_1TdEc82M
Rolling Method: Step-by-Step Guide to Perfect Spring Rolls
I’ve discovered that mastering the spring roll recipe fundamentally depends on proper rolling technique. Position your wrapper as a diamond with one corner pointing directly toward you. This orientation provides the optimal surface area for rolling and creates the tightest seal.
Place your filling in a compact log shape on the bottom third of the wrapper, positioning it approximately 1.5 inches from the bottom corner. The filling should form a horizontal log shape that spans about two-thirds the width of your wrapper. Maintaining this compact formation prevents overstuffing and ensures even cooking.
Rolling as tightly as possible without tearing prevents excessive oil absorption during frying. Research shows that loose rolls absorb up to 40% more oil compared to tightly rolled versions, resulting in greasy, heavy spring rolls.
The Five Essential Rolling Steps
- Position & Fill: Place your filling 1.5 inches from the bottom corner in a neat horizontal log shape
- First Tuck: Lift the bottom corner over the filling, then pull back slightly to compact the filling into a neat cylinder
- Envelope Fold: Fold the left corner toward the center, then fold the right corner over it
- Final Roll: Continue rolling up toward the top corner with gentle, consistent pressure
- Seal: For fried or baked wrappers, use cornstarch slurry (1:2 ratio of cornstarch to water) on the final corner; rice paper naturally sticks to itself
The first tuck requires particular attention since it determines how tightly packed your finished roll becomes. I lift the bottom corner completely over the filling, then gently pull it back toward myself. This motion compacts the filling and eliminates air pockets that could cause uneven cooking.
During the envelope fold, I ensure each side corner overlaps slightly in the center. This overlap creates a stronger seal that won’t pop open during cooking. The final rolling motion should maintain consistent pressure without squeezing so hard that the wrapper tears.
For frying, I use neutral oils with high smoke points like peanut, canola, grapeseed, or safflower oil. Maintaining oil temperature between 350°F and 375°F (175°C-190°C) ensures proper cooking without burning the exterior before the filling heats through.
Baking or air frying requires a temperature of 400°F (200°C). I bake traditional spring rolls for 20-25 minutes or air fry them for 10-12 minutes, flipping halfway through for even browning. This method produces crispy results with significantly less oil than deep frying.
For meal prep enthusiasts, freezing uncooked rolls works exceptionally well. I place rolled spring rolls on a parchment-lined baking sheet, ensuring they don’t touch each other. After freezing for 1-2 hours until solid, I transfer them to freezer bags where they’ll keep for up to three months.
Cooking frozen rolls requires no thawing time. I cook them directly from frozen, adding 3-5 minutes to the standard cooking time. This convenience makes spring rolls an excellent make-ahead option for parties or busy weeknight dinners.
The cornstarch slurry sealing technique works particularly well for traditional wheat-based wrappers. I mix one part cornstarch with two parts water until smooth, then brush this mixture on the final corner before completing the roll. This creates a waterproof seal that holds during cooking.
Creative wrapper applications extend beyond traditional spring rolls, but the fundamental rolling technique remains consistent. Whether you’re making dessert versions with fruit fillings or experimenting with rice paper alternatives, these rolling principles ensure professional-quality results every time.
https://www.youtube.com/watch?v=K1SziLZZj3c
Sources:
– Spring Roll Wrappers: Types and Selection Guide
– Preparing Your Wrappers: The Essential First Steps
– Perfect Filling Techniques for Foolproof Spring Rolls
– Rolling Method: Step-by-Step Guide to Perfect Spring Rolls