Mastering spring roll preparation combines selecting the right wrapper with proper technique to create restaurant-quality results at home. This comprehensive guide covers everything from wrapper selection and workspace setup to the precise rolling technique and professional presentation methods that transform simple ingredients into stunning appetizers.
Key Takeaways
- Choose the right wrapper – Use rice paper for fresh, no-cook rolls and wheat flour wrappers for crispy fried varieties, with proper hydration being critical for rice paper success
- Set up an efficient workspace – Arrange your station left to right with warm water bath, smooth plastic rolling surface, pre-portioned fillings, and serving plate for optimal workflow
- Master the roll and tuck technique – Place fillings in the bottom third with 1.5-inch side borders, perform a tight initial tuck, fold sides inward, then roll with consistent pressure for compact results
- Control moisture and temperature – Use completely cooled, room-temperature fillings and pat all ingredients dry to prevent wrapper sogginess and structural failure
- Create visual appeal – Position colorful ingredients like shrimp and herbs against the wrapper first for a beautiful “window” effect, then cut diagonally with a cold, wet knife for clean presentation
The art of spring roll creation hinges on understanding your wrapper’s unique characteristics and adapting your technique accordingly. Rice paper behaves differently than wheat flour wrappers, requiring distinct approaches for optimal results.
Selecting Your Wrapper Type
Rice paper delivers the classic fresh spring roll experience. I prefer brands from Vietnam or Thailand, which offer superior flexibility and tear resistance. Look for round sheets measuring 8.5 to 9 inches in diameter. Thickness matters – medium-weight papers provide the best balance between durability and transparency.
Wheat flour wrappers excel for fried spring rolls. These come in various sizes, but I recommend 8-inch squares for most applications. Spring roll wrappers differ from egg roll wrappers in their thinner construction and lighter texture after frying.
Workspace Setup and Organization
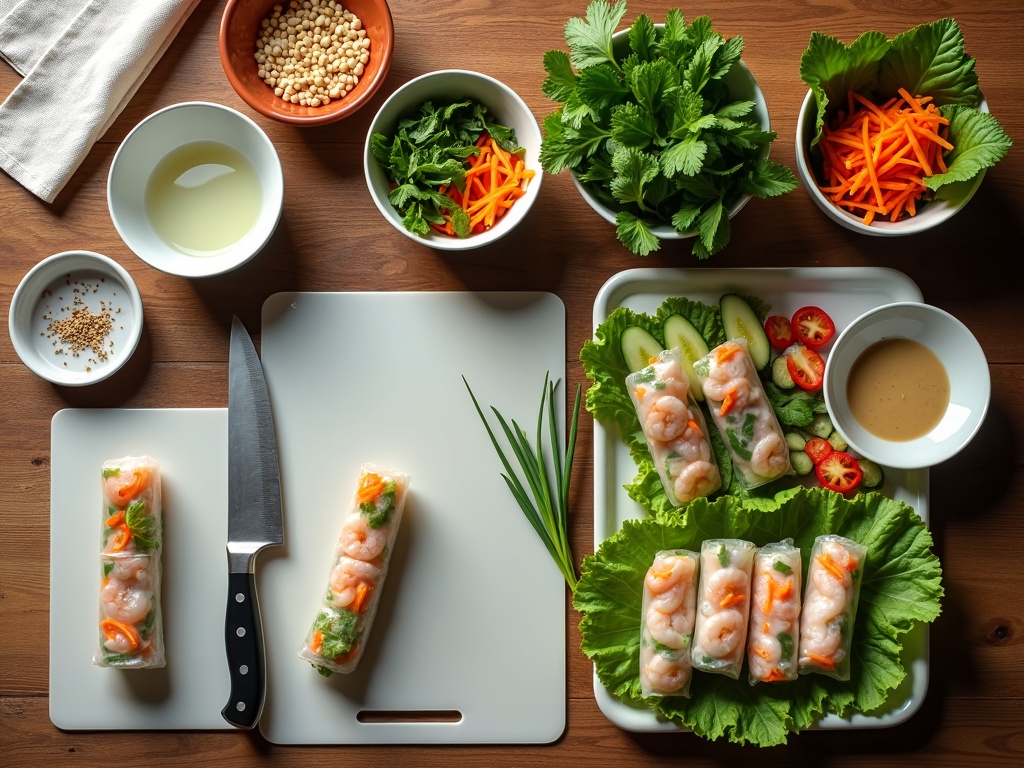
Create an assembly line that flows smoothly from left to right. Position your warm water bath on the far left, followed by your rolling surface, pre-portioned fillings, and finally your serving plate.
Use a large shallow dish filled with warm water for rice paper hydration. The water temperature should feel comfortably warm to your fingertips – too hot damages the wrapper, while cold water takes too long to soften the paper.
Choose a smooth plastic cutting board or clean countertop for your rolling surface. Avoid rough textures that might tear delicate wrappers. Keep a clean, damp towel nearby for wiping your hands between rolls.
Preparing and Arranging Fillings
Pre-portion all ingredients before starting your assembly process. Cut vegetables into uniform matchsticks, roughly 3 inches long and 1/4 inch wide. This consistency ensures even rolling and attractive cross-sections.
Cool all cooked ingredients to room temperature before assembly. Hot fillings create steam that softens wrappers prematurely and leads to tears. Pat moisture from vegetables and proteins using paper towels.
Arrange fillings in small bowls or on plates within easy reach. Group complementary ingredients together to streamline your assembly process.
Hydrating Rice Paper Correctly
Submerge rice paper in warm water for 10-15 seconds until it begins to soften. The wrapper should remain slightly firm when you remove it – residual heat continues the softening process on your work surface.
Place the softened wrapper on your rolling surface and wait 30-60 seconds for complete pliability. Properly hydrated rice paper feels smooth and flexible without any stiff spots.
Work with one wrapper at a time to prevent over-softening. Multiple wrappers quickly become sticky and unmanageable.
The Perfect Rolling Technique
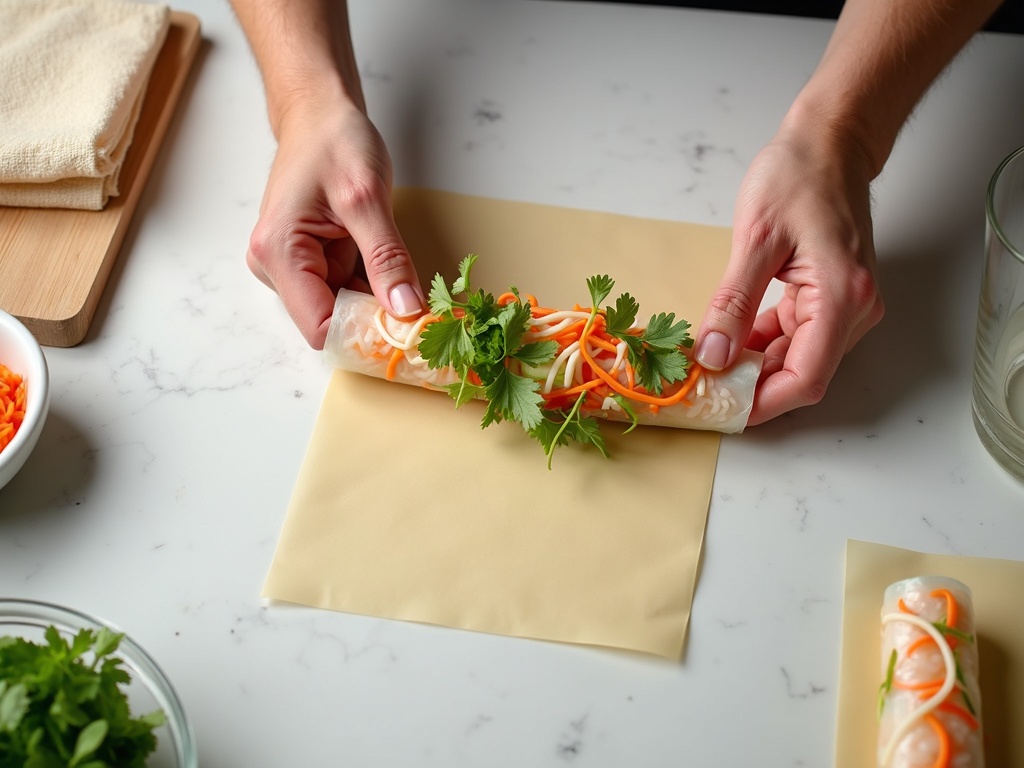
Position your fillings horizontally across the bottom third of the wrapper, leaving 1.5 inches clear on each side. Place firmer ingredients like vegetables first, followed by proteins and herbs on top.
Create your initial tuck by lifting the bottom edge of the wrapper over the fillings. Pull this edge snugly under the ingredients to eliminate air pockets. Firm pressure at this stage prevents loose, sloppy rolls.
Fold the left and right sides inward over the filling bundle. These side folds should overlap slightly in the center, creating a secure seal.
Continue rolling toward the top edge, maintaining consistent pressure throughout the motion. Each complete turn should feel tight and controlled. The final seam naturally adheres to the wrapper without additional moisture.
Managing Common Rolling Challenges
Tears happen when wrappers become over-hydrated or when excessive force is applied. If a small tear occurs early in the rolling process, continue carefully – the subsequent layers often mask minor damage.
Prevent sticking by ensuring your work surface remains clean and dry between rolls. Wipe away any moisture or food particles that accumulate.
Address loose rolls by adjusting your filling quantity. Overfilled wrappers resist tight rolling, while underfilled ones lack structural integrity.
Achieving Professional Presentation
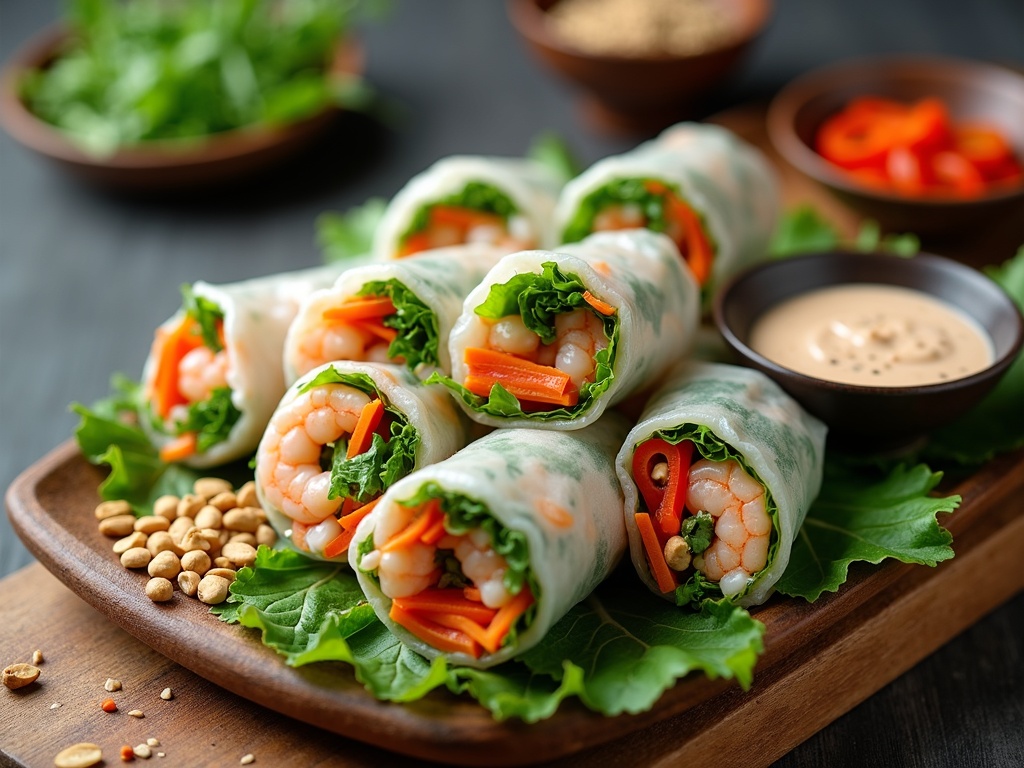
Position colorful ingredients strategically for visual impact. Place shrimp, bright vegetables, or fresh herbs against the wrapper first – these elements show through the translucent rice paper beautifully.
Cut finished rolls diagonally using a sharp, cold knife. Dip the blade in cold water between cuts to prevent sticking and ensure clean edges.
Arrange cut rolls on serving plates with the diagonal cuts facing up to showcase the internal ingredients. Garnish with fresh herbs or edible flowers for restaurant-style presentation.
Storage and Serving Guidelines
Serve fresh spring rolls immediately for the best texture and appearance. If storage becomes necessary, cover rolls with a damp towel and refrigerate for up to 4 hours.
Prevent rolls from sticking together by placing parchment paper between layers. Avoid plastic wrap, which traps moisture and compromises wrapper texture.
Prepare dipping sauces in advance, allowing flavors to meld while you focus on rolling. Traditional options include peanut sauce, sweet chili sauce, or Vietnamese nuoc cham.
Troubleshooting Temperature and Moisture Issues
Room temperature ingredients roll more successfully than cold ones. Remove refrigerated items 15-20 minutes before assembly to achieve optimal temperature.
Combat excessive moisture by using a salad spinner for leafy greens and pressing tofu or other proteins between paper towels before use.
Adjust your workspace humidity when possible. Extremely dry conditions can cause wrappers to crack, while high humidity makes them overly sticky.
Spring roll mastery develops through practice and attention to detail. Each successful roll builds your confidence and technique, eventually making the process feel natural and effortless. Start with simple ingredient combinations before advancing to more complex fillings and presentations.
Selecting Your Spring Roll Wrapper: The Foundation of Your Roll
I always start by choosing the right wrapper because it determines both the cooking method and final texture of your spring rolls. The two main categories serve completely different purposes, and understanding their characteristics will guide your entire preparation approach.
Understanding Rice Paper vs. Wheat Flour Wrappers
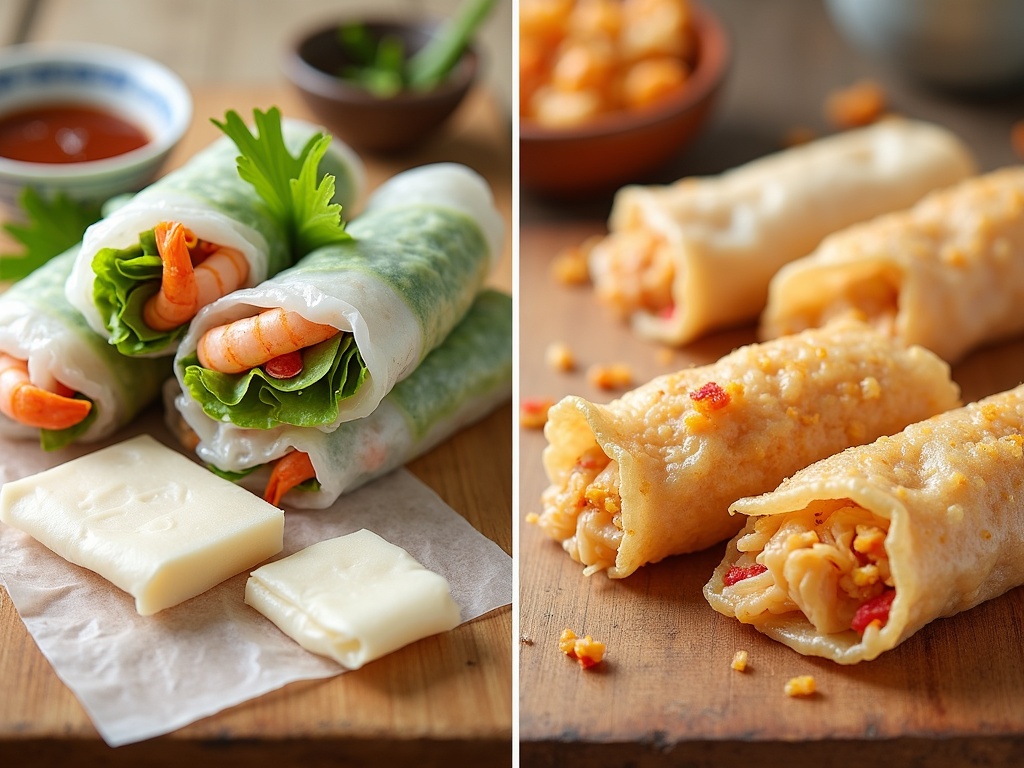
Rice paper, known as bánh tráng in Vietnamese cuisine, creates the foundation for fresh, uncooked summer rolls (gỏi cuốn). These translucent circles are made from rice flour, tapioca starch, water, and salt, making them naturally gluten-free. When you hydrate them properly, they transform from rigid discs into soft, pliable wraps with a delightfully chewy texture.
Wheat flour wrappers serve an entirely different purpose. I use these thin, opaque sheets for fried spring rolls like Chinese spring rolls or Filipino lumpia. They maintain a doughy texture when raw but become golden and crispy when fried. These wrappers are thinner and more delicate than egg roll wrappers, creating a shatteringly crisp texture that contrasts beautifully with tender fillings.
Sizing and Preparation Techniques
Rice paper comes in various sizes, ranging from 16cm (6.3 inches) to 31cm (12.2 inches) in diameter. I recommend starting with standard 22cm (8.5-inch) wrappers for home use because they provide the perfect balance of manageable size and filling capacity.
Proper hydration makes the difference between success and frustration. I maintain warm water between 95°F and 105°F (35°C to 40°C)—hot enough to activate the wrapper but not so hot that it becomes mushy. Submerge each rice paper for only 15–20 seconds. It should feel slightly stiff when you remove it, but don’t worry; it continues softening on your rolling surface.
Brand quality matters significantly. Three Ladies Brand has earned its reputation for superior pliability and tear resistance compared to more brittle varieties. I’ve found that investing in quality wrappers reduces waste and frustration during preparation.
For fried applications, spring roll wrappers differ from egg roll wrappers in important ways:
- Spring roll wrappers are paper-thin and create that coveted shatteringly crisp texture.
- Egg roll wrappers are thicker, often contain egg, and produce a chewier, more substantial, and bubbly crust when fried.
Choose rice paper when you want a fresh, no-cook approach with delicious rice paper rolls that showcase vibrant ingredients. Opt for wheat flour wrappers when your goal is creating hot, crispy, fried appetizers that deliver satisfying crunch with every bite.
The Perfect Spring Roll Setup: Preparation is Key
I always emphasize that successful spring roll making starts long before you touch your first wrapper. Proper preparation transforms what could be a frustrating experience into a smooth, enjoyable process that yields consistently beautiful results.
Creating Your Assembly Line
Setting up an efficient workspace follows a specific order that I’ve refined through countless rolling sessions. Start by arranging your station from left to right:
- Place your warm water bath first
- Followed by your rolling surface
- Then organize your prepared fillings in the exact order you’ll layer them
- Finally, position your serving plate at the end
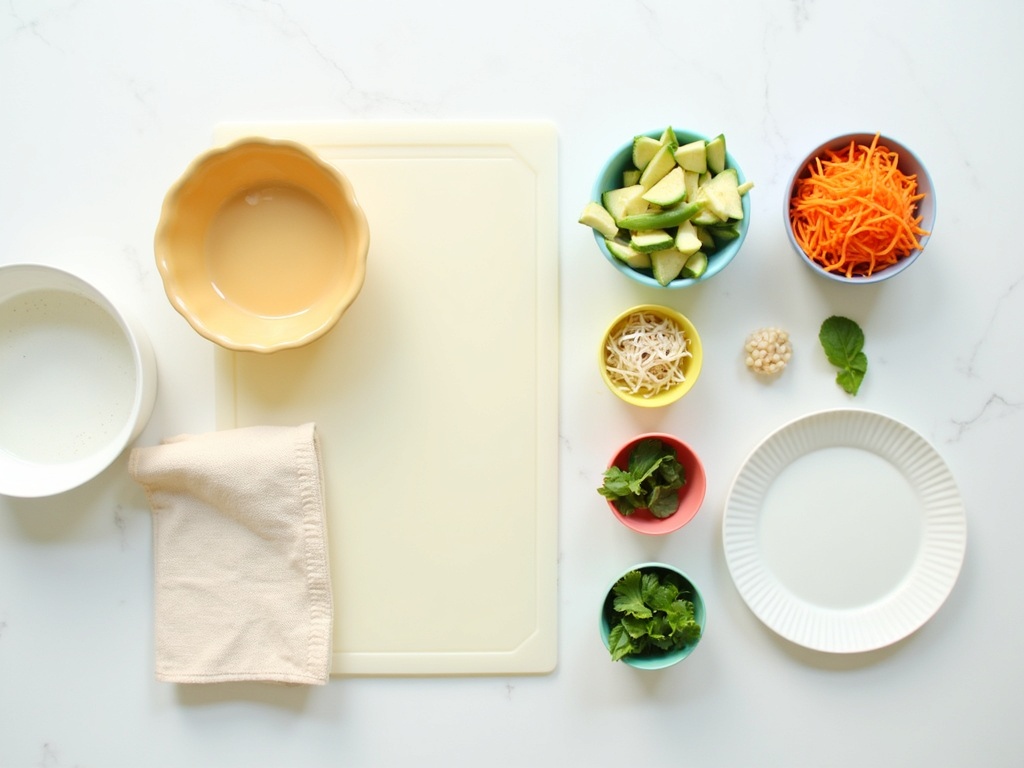
For the water bath, I recommend using a shallow dish or pie plate filled with 1–2 inches of warm water. This depth allows complete wrapper hydration without creating unnecessary mess or making retrieval difficult.
Your rolling surface makes or breaks your spring roll success. I’ve found that a smooth plastic cutting board performs best – rice paper is 40% more likely to stick to and tear on porous or textured surfaces like granite or rough-grained wood. A slightly damp plastic cutting board offers the perfect amount of grip without being overly sticky. Avoid glass surfaces entirely, as wet wrappers create a suction effect that makes rolling nearly impossible.
Keep a damp kitchen towel within arm’s reach to wipe your surface between rolls. This simple step prevents starch buildup that can cause subsequent wrappers to stick and tear. I can’t stress enough how this small detail dramatically improves your rolling consistency.
Perfecting Your Filling Strategy
Texture balance creates spring rolls that are both satisfying and structurally sound. I always combine three distinct elements in my fillings:
- Soft components like vermicelli noodles, avocado, or cooked proteins provide substance and creaminess
- Crunchy elements such as julienned carrots, cucumber, or bean sprouts add textural interest and freshness
- Fresh herbs including mint, cilantro, and basil contribute aromatic complexity and visual appeal
Moisture control determines whether your spring rolls hold together or fall apart. All proteins like shrimp and chicken must be completely cooked and cooled before assembly. Hot ingredients will steam the wrapper, making it soggy and prone to tearing. For rice paper rolls, I cook noodles until just tender, then rinse them thoroughly in cold water and drain completely.
I pat all washed vegetables and herbs completely dry with paper towels or a clean kitchen towel. Excess moisture is your primary enemy when making spring rolls, causing both sogginess and structural failure. Even seemingly dry ingredients like lettuce leaves can harbor surprising amounts of water in their crevices.
The filling-to-wrapper ratio requires precision for optimal results. I use approximately 1/3 to 1/2 cup of filling for a standard 22cm (8.5-inch) wrapper. Less filling creates loose, unsubstantial rolls, while overfilling makes them impossible to close properly and prone to bursting.
Pre-portion your fillings into small bowls or containers before you begin rolling. This mise en place approach ensures consistent portion sizes and prevents you from rushing through assembly while wrappers become overhydrated. I arrange ingredients in small bowls in the exact order I’ll layer them, making the rolling process intuitive and efficient.
Temperature matters more than most people realize. Room temperature fillings work best – they won’t shock the delicate wrapper or create condensation that leads to sogginess. If you’re using spring roll wrappers that require different handling, adjust your setup accordingly, but these principles remain constant.
This methodical approach to preparation eliminates guesswork and creates consistent results every time. Once you’ve mastered this setup, you’ll find yourself making spring rolls like a professional with confidence and speed.
The Roll and Tuck Technique: Master the Perfect Fold
Creating a perfectly tight spring roll starts with proper preparation and follows a precise sequence that transforms loose ingredients into a compact, professional-looking package. I’ll walk you through each step of this essential technique that separates amateur attempts from restaurant-quality results.
Essential Steps for Perfect Spring Roll Assembly
The foundation begins with properly hydrating your wrapper. I dip the rice paper wrapper briefly in warm water—just long enough to soften it without making it too pliable. Lay the softened wrapper flat on your clean work surface, ensuring no wrinkles or air bubbles interfere with your rolling process.
Next comes the strategic placement of your fillings. I arrange all ingredients in a horizontal log formation on the bottom third of the wrapper, maintaining a crucial 1.5-inch border on both left and right sides. This border space prevents fillings from spilling out during the rolling process. For optimal results, I recommend this balanced filling composition:
- 30% protein (cooked shrimp, chicken, or tofu)
- 30% noodles (rice vermicelli or glass noodles)
- 30% crunchy vegetables (julienned carrots, cucumber, bell peppers)
- 10% fresh herbs (cilantro, mint, or Thai basil)
The critical moment arrives with the first fold and tuck. I lift the bottom edge of the wrapper up and over the filling, then use my fingers to pull the filling back firmly against me. This creates the tight initial cylinder that determines your roll’s final quality. The initial tuck reduces the chance of the roll loosening or falling apart by over 70%, making this step absolutely essential for success.
Following the initial tuck, I fold both left and right sides inward over the filling, creating clean, straight edges similar to an envelope. These side folds contain the filling and provide the structure needed for the final rolling phase. Make sure these folds are snug but not so tight that they tear the delicate wrapper.
The final roll requires steady, consistent pressure as you continue rolling the package away from yourself. I maintain gentle but firm pressure throughout this motion, ensuring the wrapper stays taut and compact. The naturally sticky surface of the hydrated rice paper will seal against itself, eliminating the need for additional moisture or binding agents.
Think of this process like rolling a burrito—consistent inward pressure creates the compact, secure package you’re aiming for. I keep my hands positioned on both sides of the roll, applying even pressure to prevent bulging or loose spots that could compromise the structural integrity.
With practice, you can complete one roll in 30–45 seconds. Speed develops naturally as your muscle memory improves, but focus on technique over timing initially. Each wrapper behaves slightly differently depending on its thickness and how long it’s been hydrated, so adapt your pressure accordingly.
Temperature control plays a significant role in successful rolling. I work with room-temperature fillings whenever possible, as hot ingredients can make the wrapper too soft and difficult to handle. Cold ingredients, particularly proteins, should be brought closer to room temperature before assembly to prevent condensation inside the wrapper.
The beauty of mastering this technique extends beyond basic spring rolls. Once you’ve perfected the roll and tuck method, you can apply these same principles to create rice paper rolls or experiment with different spring roll recipes. Understanding proper wrapper handling opens up countless possibilities for creative filling combinations and presentation styles.
Remember that each wrapper has a brief window of optimal workability after hydration. I complete each roll efficiently but without rushing, as torn wrappers can’t be salvaged and must be discarded. Store completed rolls under a damp towel to prevent the wrapper from drying out if you’re preparing multiple servings.
https://www.youtube.com/watch?v=bCUe-DxwFG4
Styling and Serving: Elevate Your Spring Roll Presentation
I’ve discovered that presentation transforms ordinary spring rolls into restaurant-quality appetizers. The secret lies in strategic ingredient placement and professional finishing touches that showcase your culinary skills.
Creating the Perfect Visual Window
Smart ingredient placement creates stunning visual appeal in your finished rolls. I always position the most colorful ingredients on the wrapper first, ensuring they’ll be visible through the translucent rice paper. Here’s how I achieve that perfect “window” effect:
- Place 3 shrimp halves pink-side down in a neat row, positioned about one-third from the top edge
- Arrange whole mint leaves in a straight line for vibrant green color contrast
- Layer bright herbs like cilantro or Thai basil directly against the wrapper
- Add julienned carrots or bell peppers for additional color pops
- Reserve the bulk fillings for the bottom third, piling them on top of your showcase ingredients
This technique ensures every roll displays its beautiful contents like a work of art. The contrast between pink shrimp and emerald herbs creates an irresistible visual appeal that guests notice immediately.
Professional cutting technique makes all the difference in presentation. I use a very sharp knife, dipping it in cold water before each cut to prevent the sticky rice paper from tearing. The starch on rice paper creates incredible adhesion, but cold water forms a barrier that allows clean slicing. I cut on a sharp diagonal to reveal the gorgeous cross-section of colorful fillings inside each roll.
For plating, I arrange finished rolls on lettuce-lined platters, creating an elegant foundation that prevents sticking. Fresh garnishes elevate the entire presentation – I sprinkle crushed peanuts for texture, add toasted sesame seeds for nutty flavor, or scatter thinly sliced chilis for visual heat and spice.
Dipping sauces complete the experience and offer guests flavor variety. Vietnamese Nuoc Cham provides the traditional pairing – I mix fish sauce, water, sugar, fresh lime juice, garlic, and chili using the classic 1:1:2:0.5 ratio (1 part fish sauce to 1 part sugar to 2 parts water to 0.5 part lime juice), then adjust to taste. This light, tangy sauce complements the fresh ingredients perfectly.
For richer preferences, I prepare creamy peanut sauce by combining peanut butter, hoisin sauce, soy sauce, and lime juice. The smooth, nutty flavor provides satisfying contrast to crisp vegetables and herbs. When I want something quick yet flavorful, I thin hoisin sauce with water and add a swirl of Sriracha for heat.
Temperature matters for optimal serving. I keep completed rolls covered with damp paper towels at room temperature for up to two hours before serving. This prevents the wrappers from drying out while maintaining the fresh texture that makes rice paper rolls so appealing.
The key to impressive spring roll presentation lies in planning your color palette before you start rolling. I mentally map out where each ingredient will sit, ensuring maximum visual impact when the roll is complete. Remember that guests eat with their eyes first – beautiful presentation sets expectations for the delicious flavors they’re about to experience.
Whether you’re making spring rolls at home for family dinner or preparing an elegant appetizer spread, these presentation techniques transform simple ingredients into stunning culinary displays. Master these styling fundamentals, and your spring rolls will look as professional as they taste.