

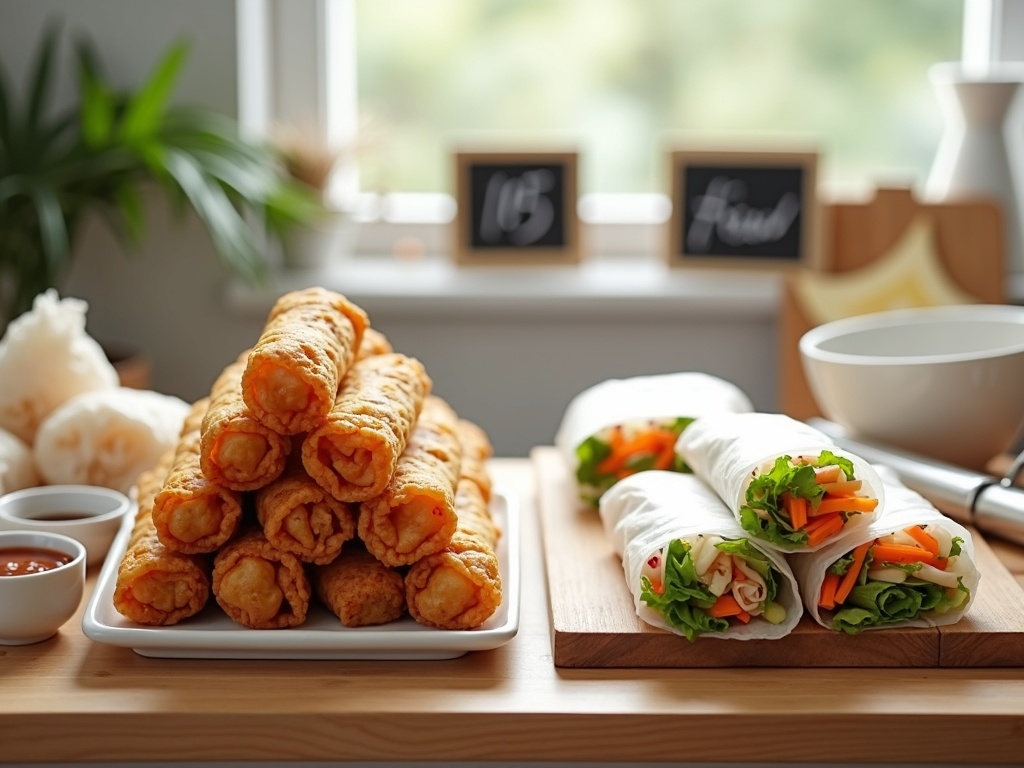
Creating professional-quality spring rolls at home requires mastering three fundamental elements: selecting the appropriate wrapper type, preparing well-balanced fillings with proper moisture control, and executing precise rolling and cooking techniques. The choice between wheat-based wrappers for crispy fried versions or rice paper for fresh rolls determines the entire cooking approach, while maintaining ingredient ratios of approximately 2 parts vegetables to 1 part protein ensures optimal texture and structural integrity.
Key Takeaways
- Choose wheat-based wrappers for crispy fried spring rolls and rice paper wrappers for fresh versions, with rice paper requiring 15–30 second hydration in 100–110°F water.
- Maintain a 2:1 vegetable-to-protein ratio by volume and cool all ingredients below 75°F before assembly to prevent wrapper tearing and moisture issues.
- Use 2–3 tablespoons of filling per 8-inch wrapper, rolling tightly with proper sealing techniques using cornstarch slurry or egg wash.
- Deep fry at 350–375°F for 3–5 minutes or air fry at 380°F for 8–12 minutes, turning once to achieve golden brown color.
- Prepare authentic dipping sauces like Vietnamese Nuoc Cham using the 1:1:2:1/2 ratio of sugar, fish sauce, water, and lime juice for optimal flavor balance.
Essential Spring Roll Components
Spring roll success starts with understanding each component’s role in the final product. I’ve found that focusing on three core areas eliminates most common failures.
Wrapper Selection and Preparation
Wheat-based wrappers deliver superior crispiness for fried applications. These thicker wrappers withstand high-heat cooking without breaking down. Rice paper wrappers work best for fresh preparations and lighter fried options.
Rice paper activation requires precise timing. Submerge each wrapper in warm water (100–110°F) for exactly 15–30 seconds. Over-hydration creates mushy, difficult-to-handle wrappers. Under-hydration leads to cracking during rolling.
Temperature control matters significantly. I always keep hydrated rice paper at room temperature and use it within 5 minutes of preparation.
Filling Composition and Balance
Proper filling ratios prevent structural collapse and ensure even cooking. The 2:1 vegetable-to-protein ratio provides optimal texture while maintaining wrapper integrity.
Moisture management determines success or failure. Excess liquid from vegetables creates soggy wrappers and prevents proper sealing. I salt vegetables like cabbage and cucumbers 10 minutes before use, then pat them completely dry.
Protein preparation requires pre-cooking and cooling. Raw proteins release moisture during cooking, compromising wrapper stability. Cooked proteins below 75°F prevent premature wrapper softening.
Rolling Technique Mastery
Consistent filling portions ensure uniform cooking and presentation. I measure 2–3 tablespoons per 8-inch wrapper, adjusting slightly for ingredient density.
Rolling technique follows a specific sequence:
- Place filling in the lower third of the wrapper
- Fold bottom edge over filling
- Fold in sides
- Roll tightly forward
Cornstarch slurry (1 tablespoon cornstarch mixed with 2 tablespoons water) creates stronger seals than egg wash for most applications.
Sealing pressure should be firm but gentle. Excessive force tears wrappers while insufficient pressure allows filling to escape during cooking.
Cooking Methods and Temperatures
Deep frying produces the crispiest texture but requires careful oil management. Oil temperature between 350–375°F ensures proper cooking without burning. Lower temperatures create greasy results while higher temperatures burn exteriors before interiors heat through.
Frying time depends on wrapper thickness and filling density. Standard spring rolls need 3–5 minutes, turning once at the halfway point. Visual cues include golden-brown color and audible sizzling reduction.
Air frying offers healthier results with comparable crispiness. Set temperature to 380°F and cook for 8–12 minutes, turning once. Brush wrappers lightly with oil before cooking for better browning.
Pan-frying works well for smaller batches. Use medium-high heat with 1–2 tablespoons oil, turning every 2–3 minutes until all sides achieve golden color.
Professional Dipping Sauce Preparation
Vietnamese Nuoc Cham represents the gold standard for spring roll accompaniment. The precise ratio of 1:1:2:1/2 (sugar:fish sauce:water:lime juice) creates perfect flavor balance.
Preparation sequence affects final taste. Dissolve sugar completely in warm water first, then add fish sauce and lime juice. This prevents sugar crystallization and ensures smooth texture.
Thai sweet chili sauce offers alternative flavor profiles. Combine 1/2 cup rice vinegar, 1/4 cup sugar, 2 tablespoons water, 1 minced Thai chili, and 1 teaspoon salt. Simmer until sugar dissolves and mixture thickens slightly.
Chinese-style soy-based dipping sauce pairs excellently with vegetable spring rolls. Mix 3 tablespoons soy sauce, 1 tablespoon rice vinegar, 1 teaspoon sesame oil, and 1/2 teaspoon sugar. Add sliced scallions for freshness.
Storage and Service Tips
Fresh spring rolls maintain quality for 24 hours when stored properly. Wrap individually in damp paper towels, then place in airtight containers. Refrigerate immediately and consume within one day.
Fried spring rolls retain crispiness through proper cooling and storage. Cool completely on wire racks before storing to prevent condensation. Reheat in 350°F oven for 5–7 minutes rather than microwaving.
Service temperature affects flavor perception. Fresh rolls taste best at room temperature while fried versions should be served hot. I recommend preparing fried spring rolls no more than 30 minutes before serving for optimal texture.
Garnish selection enhances presentation and flavor. Fresh herbs like cilantro, mint, and Thai basil complement most spring roll varieties. Sliced chilies add heat while bean sprouts provide textural contrast.
Common Troubleshooting Solutions
- Wrapper cracking during rolling indicates insufficient hydration or excessive filling. Reduce filling quantity by 25% and extend hydration time by 5–10 seconds.
- Soggy bottoms result from excess moisture or insufficient oil temperature. Drain all vegetables thoroughly and verify oil temperature with a thermometer before frying.
- Uneven cooking stems from inconsistent rolling tension or varying wrapper thickness. Practice consistent rolling pressure and source wrappers from reliable suppliers.
- Filling leakage occurs when sealing fails or wrappers tear. Reduce filling quantity and ensure cornstarch slurry covers all sealing edges completely.
- Bland flavor indicates inadequate seasoning or sauce pairing. Season fillings individually before assembly and provide multiple dipping sauce options for varied taste preferences.
Choosing the Perfect Wrapper: The Foundation of Your Spring Roll
Your wrapper choice determines whether you’ll create fresh summer rolls or crispy fried delights. I recommend understanding the two primary options: thin, wheat-based wrappers for frying and translucent rice paper wrappers for fresh preparations. This decision shapes everything from texture to cooking method.
Understanding Your Wrapper Options
Wheat-based wrappers contain gluten and offer a doughy, pliable texture that transforms into a beautifully blistered, golden-brown crust when fried. You’ll find these spring roll wrappers in the refrigerated or frozen section of most grocery stores. Lumpia wrappers and egg roll wrappers fall into this category, each providing that satisfying crunch when properly fried.
Rice paper wrappers tell a different story entirely. Made from rice flour, tapioca starch, and salt, these translucent sheets are incredibly thin—often less than 0.5mm thick. They’re sold dried in packages and must be rehydrated before use. Vietnamese Gỏi cuốn relies on these delicate wrappers for their signature fresh spring rolls.
I’ve found that rice paper preparation requires precise timing. The ideal water temperature sits between 100-110°F (38-43°C), with soaking time limited to just 15-30 seconds. Longer soaking leads to tearing and frustration. The wrapper should feel pliable but not overly soft when you lift it from the water.
Fresh rice paper delivers a chewy texture that many find appealing in summer rolls. However, these same wrappers can be fried for a delicate, thin crisp that differs significantly from wheat-based alternatives. The gluten-free nature of rice paper means it won’t develop the same robust, chewy interior that wheat wrappers provide when fried.
Temperature control matters immensely when working with rice paper. Water that’s too hot will make the wrapper dissolve, while cold water won’t soften it adequately. I keep a thermometer handy until you develop a feel for the right temperature. Your fingertip should detect warmth without discomfort when testing the water.
Wheat-based wrappers offer more forgiveness during preparation. They can sit longer without becoming unworkable, making them ideal for beginners or when preparing large batches. Their gluten content provides elasticity that resists tearing during rolling and filling.
Storage differs between wrapper types as well. Dried rice paper keeps for months in a cool, dry place, while wheat-based wrappers require refrigeration or freezing. Always check expiration dates, particularly with refrigerated products.
Consider your intended filling when selecting wrappers:
- Heavy, wet fillings work better with sturdier wheat-based options.
- Lighter, fresh ingredients pair beautifully with rice paper’s delicate nature.
The wrapper should complement, not compete with, your chosen ingredients.
Texture preferences play a crucial role in your decision:
- Crispy, substantial bites call for wheat wrappers.
- Light, refreshing meals benefit from rice paper’s subtlety.
Both have their place in a well-rounded spring roll repertoire.
I recommend keeping both types on hand once you’re comfortable with basic techniques. This allows you to adapt recipes based on mood, season, or available ingredients. Fresh rolls work wonderfully for summer entertaining, while fried versions satisfy heartier appetites during cooler months.
Practice with rice paper first if you’re new to spring roll making. The immediate feedback from proper hydration teaches important lessons about timing and texture that transfer to other cooking techniques. Master the 15-30 second window, and you’ll avoid the common pitfall of over-softened, unusable wrappers.
Crafting the Perfect Filling: Balancing Flavor, Texture, and Moisture
Creating professional-quality spring roll fillings requires careful attention to ingredient proportions and moisture management. I’ve found that the ideal ratio of approximately 2 parts vegetables to 1 part protein by volume creates the perfect balance of textures and flavors without overwhelming the delicate wrapper.
Essential Preparation Techniques
Proper ingredient preparation forms the foundation of exceptional spring rolls. I always start by julienning all vegetables into uniform strips, which ensures even cooking and creates an appealing visual presentation when sliced. This consistent cutting technique also helps ingredients bind together during rolling, preventing loose pieces from puncturing the wrapper.
Temperature control proves critical for wrapper integrity. I always cool all cooked ingredients to below 75°F (24°C) before assembly, as hot ingredients create steam that can tear the wrapper and result in structural failure during frying. For proteins, I cook ground pork or chicken to 160°F (71°C), ensuring all moisture has evaporated completely. Shrimp requires gentler treatment—I poach or stir-fry just until pink and opaque to maintain tenderness.
Moisture management separates amateur attempts from restaurant-quality results. I salt shredded cabbage and let it sit for 15 minutes, then squeeze out excess water using clean kitchen towels. This simple step prevents soggy rolls that burst during cooking. Glass noodles, when properly rehydrated and drained, add delightful chewy texture without introducing problematic moisture.
Aromatics like garlic, ginger, and scallions require sautéing first to release their full flavor potential. I cook these ingredients until fragrant but not browned, allowing their essence to permeate the entire filling mixture. Fresh herbs such as cilantro and mint should be added last to preserve their bright flavors and prevent wilting.
The assembly process becomes significantly easier when ingredients are prepared uniformly and cooled properly. I combine all components gently to avoid breaking delicate vegetables or creating dense pockets that can stress the wrapper during rolling. For those new to spring roll preparation, rice paper roll techniques share similar principles that can enhance your filling preparation skills.
Vegetarian variations benefit from adding mushrooms or tofu for protein content while maintaining the same moisture control principles. I press tofu thoroughly and cube it small to integrate seamlessly with vegetable components, creating satisfying texture contrast without compromising wrapper integrity.
The Art of Rolling and Cooking to Perfection
Mastering the Rolling Technique
Perfect spring rolls start with proper filling proportions. I recommend using 2-3 tablespoons of filling per standard 8-inch wrapper — any more and you’ll face the most common problem: bursting seams during cooking. Overfilling accounts for nearly every rolling failure I’ve encountered.
Position your wrapper as a diamond shape on your work surface. Place the filling about 2 inches from the bottom corner, creating enough space for a secure seal. Lift the bottom corner over the filling with a tight tuck, ensuring no air pockets remain. Fold in the left and right sides, then roll upward tightly while maintaining consistent pressure. Seal the final edge with either a cornstarch slurry (1 tablespoon cornstarch mixed with 2 tablespoons water) or a simple egg wash for the strongest hold.
Achieving Perfect Cooking Results
Temperature control determines whether your spring rolls turn out crispy or soggy. For deep frying, maintain oil temperature between 350-375°F (175-190°C) using a reliable cooking thermometer. Oil that’s too cool (below 325°F) causes the wrapper to absorb excess oil, creating greasy results. Conversely, oil above 400°F burns the exterior before the filling heats through properly.
When deep frying:
- Submerge rolls in high-smoke-point oil for 3-5 minutes
- Turn once until they achieve a golden brown color
- Avoid overcrowding your pan to maintain a consistent temperature
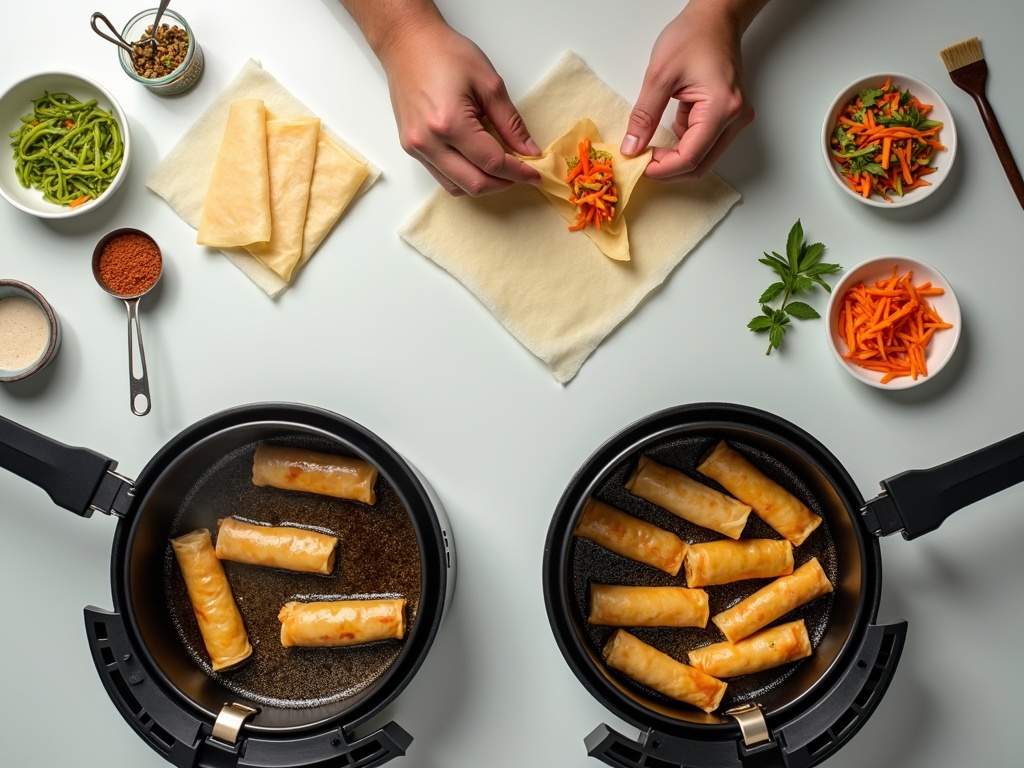
Air frying offers a healthier alternative with excellent results. Preheat your air fryer to 380°F (193°C) and lightly brush or spray with oil. Cook for 8-12 minutes, flipping halfway through. While the texture will be slightly drier than traditional deep frying, you’ll still achieve that satisfying crunch. Rice paper rolls can provide inspiration for different wrapper techniques if you want to experiment with variations.
Both cooking methods produce crispy exteriors when executed correctly. The key lies in proper preparation, controlled temperatures, and patience during the cooking process.
Essential Dipping Sauces: The Perfect Flavor Complement
A perfectly crafted spring roll deserves an equally impressive dipping sauce. I’ve discovered that the magic lies in balancing sweet, sour, salty, and spicy elements to create a harmony that enhances every bite. These sauce recipes will transform your spring roll experience from good to exceptional.
Classic Vietnamese Nuoc Cham
Vietnamese Nuoc Cham stands as the gold standard for spring roll dipping sauces. I follow the traditional “1:1:2:1/2” ratio that creates perfect balance: 1 part sugar, 1 part fish sauce, 2 parts water, and 1/2 part lime juice.
For the most authentic preparation, I combine:
- 1/4 cup sugar
- 1/2 cup warm water
Stir until the sugar completely dissolves, then add:
- 1/4 cup fish sauce
- 3 tablespoons fresh lime juice
- 1–2 cloves of minced garlic
- 1 sliced Thai chili
The key is letting this mixture sit for 10 minutes before serving. This resting time allows the flavors to meld and the garlic to infuse throughout the sauce.
Fresh lime juice makes all the difference compared to bottled versions. I always taste and adjust the balance—some prefer more lime for extra tang, while others add a pinch more sugar for sweetness.
Rich Peanut Dipping Sauce
The creamy richness of peanut sauce provides a delightful contrast to fresh spring rolls. I prepare this by whisking together:
- 1/2 cup creamy peanut butter
- 1/4 cup hoisin sauce
- 1/4 cup warm water or coconut milk
- 1 tablespoon lime juice
- 1 teaspoon sriracha (optional)
Warm water creates a lighter consistency, while coconut milk adds richness and subtle sweetness. I whisk until the mixture is completely smooth. If it’s too thick, I slowly add more warm water, one tablespoon at a time, until I reach the desired consistency.
The sriracha is entirely optional—I often provide it on the side to let people customize their own spice level. This peanut sauce keeps well in the refrigerator for up to a week, though it’s usually gone well before that.
Convenient Sweet Chili Sauce
For busy weeknights, high-quality store-bought sweet chili sauce offers excellent convenience without sacrificing flavor. This option works particularly well with fried spring rolls, as the sticky sweetness complements the crispy exterior beautifully. I look for brands that list natural ingredients and avoid those with excessive artificial additives.
Sweet chili sauce also serves as an excellent base for customization. I sometimes stir in:
- A splash of rice vinegar for extra acidity
- Minced fresh herbs like cilantro or mint
- A few drops of sesame oil for added depth
Serving Tips and Final Thoughts
Temperature matters when serving these sauces. I prefer Nuoc Cham at room temperature, as chilling dulls the bright citrus notes. Peanut sauce can be served at room temperature or slightly warmed, which makes it easier to drizzle. Sweet chili sauce works well either way, though I find room temperature allows the flavors to shine more clearly.
Each sauce brings its own personality to the table:
- Nuoc Cham – offers bright, clean flavors that complement delicate veggies and herbs.
- Peanut Sauce – brings satisfying richness, great with protein-heavy rolls.
- Sweet Chili Sauce – delivers sweetness with gentle heat that appeals to most palates.
I often prepare all three sauces when entertaining, allowing guests to discover their personal preferences. The variety ensures everyone finds their perfect match, and the different flavor profiles encourage people to try multiple spring rolls to experience each combination.
https://www.youtube.com/watch?v=zZeS2iDcS5s