
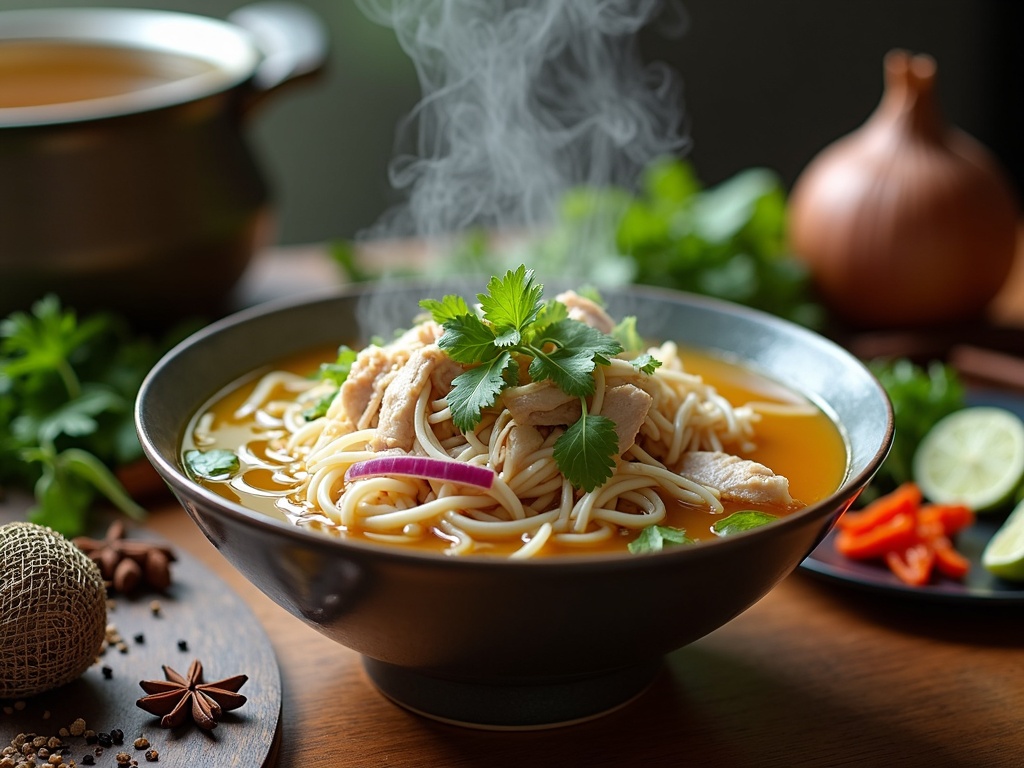
Authentic Vietnamese chicken pho, known as pho gà, is a delicate yet flavorful dish that requires precision, patience, and attention to detail. The hallmark of a truly excellent pho gà lies in its clear, golden broth made through careful cooking techniques and quality ingredients.
Key Takeaways
- Create crystal-clear broth by maintaining a gentle simmer at 190-200°F for 1.5–2 hours while carefully skimming off foam during the first 20–30 minutes.
- Parboil the whole chicken for 3–5 minutes and rinse thoroughly prior to making the main broth. This step removes surface impurities that would otherwise create a cloudy appearance.
- Char onion and ginger over an open flame for 5–7 minutes, then peel away the blackened skin. This step infuses the broth with subtly sweet, caramelized aromatics that define authentic pho.
- Cook rice noodles separately from the broth to prevent starch from clouding the soup. Use fresh noodles for 10–15 seconds or dried noodles for 3–5 minutes.
- Assemble bowls properly by layering noodles first, followed by shredded chicken and aromatics. Finally, pour boiling-hot broth on top to finish cooking raw garnishes and maintain ideal serving temperature.
Tips for Restaurant-Quality Pho Gà
Use Free-Range Chicken
Start with a whole free-range chicken to impart deeper, more flavorful notes to the broth. Free-range birds tend to have firmer meat and more complex taste, making them ideal for this long-simmered dish.
Maintain Gentle Heat Throughout
Temperature control is key. Avoid vigorous boiling; a soft simmer ensures the broth stays clear and free of disruptive bubbles or fats that emulsify and cloud the liquid.
Sourcing Authentic Ingredients
For true authenticity, consider shopping at Asian grocery stores or specialty retailers. Some ingredients and tips can also be found on resources like Serious Eats’ pho gà recipe.
Balance Garnishes
Fresh herbs such as cilantro, Thai basil, and scallions should be used generously to complement the soup’s mild flavors. Include bean sprouts, lime wedges, and jalapeños at the table for customization.
By respecting each step in preparation and focusing on ingredient quality, you can achieve a bowl of pho gà that rivals any served in a traditional Vietnamese kitchen.
The Heart of Vietnamese Phở Gà: Creating the Perfect Broth
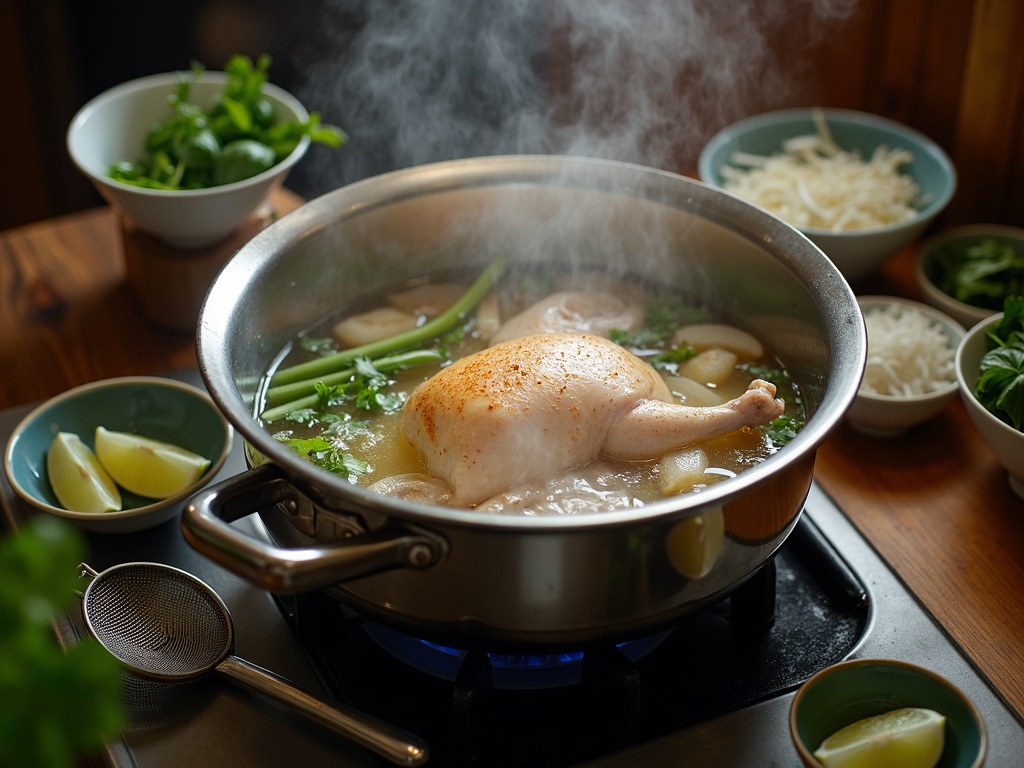
The defining characteristic of authentic Phở Gà broth lies in its crystal-clear appearance and golden hue, achieved through careful temperature control and vigilant foam removal. I always start with a whole free-range chicken (gà đi bộ) weighing 3-4 pounds (1.4-1.8 kg), which provides the ideal balance of meat and bones for creating that distinctive Vietnamese chicken stock known as Nước Lèo.
Temperature control sets the foundation for exceptional broth. I maintain a gentle simmer at 190-200°F (88-93°C) for 1.5-2 hours, a significantly shorter cooking time compared to beef pho which requires 8+ hours. Avoid boiling at all costs, as this breaks down fat and proteins into tiny suspended particles that create an undesirable cloudy appearance. A proper simmer produces tiny bubbles that barely break the surface, allowing the chicken to release its essence without compromising clarity.
Water ratio determines both flavor concentration and cooking efficiency. I use 4-5 quarts (4-5 liters) of cold water for one whole chicken, ensuring the water covers the bird by 2-3 inches. Cold water extracts more flavor during the initial heating process, while the proper ratio prevents over-dilution of the finished broth.
Essential Preparation Steps for Crystal-Clear Results
The parboiling technique removes impurities that would otherwise cloud your broth. Here’s my systematic approach:
- Parboil the whole chicken for 3-5 minutes in boiling water
- Discard the parboiling water completely
- Rinse the chicken thoroughly under cold running water
- Clean the pot entirely before starting the main broth
- Add fresh cold water and begin the proper simmering process
Foam removal (bọt) requires constant attention during the first 20-30 minutes of simmering. I use a fine-mesh sieve or ladle to carefully remove the gray foam that rises to the surface. This foam contains blood proteins and other impurities that would compromise both appearance and taste if left in the broth. Check every 5-10 minutes initially, then reduce frequency as foam production decreases.
Proper rice noodle preparation complements your clear chicken broth perfectly. The gentle simmering method I’ve described creates a clean-tasting base that allows the aromatic spices to shine through without competing with muddy flavors from improper cooking techniques.
After the initial foam removal period, I maintain the gentle simmer without stirring excessively. Aggressive stirring can emulsify fats and break down proteins, leading to cloudiness. The chicken will naturally release its flavors into the surrounding liquid while the bones contribute gelatin for body and mouthfeel.
Monitor the broth’s progression by observing the liquid’s clarity and the chicken’s tenderness. When the meat easily pulls away from the bone and the broth maintains its golden transparency, you’ve achieved the perfect Vietnamese chicken stock. Remove the chicken carefully to preserve the broth’s clarity, then strain through fine-mesh strainer lined with cheesecloth for ultimate smoothness.
This foundation broth serves as the canvas for your complete Vietnamese pho experience, providing the clean, aromatic base that distinguishes authentic Phở Gà from ordinary chicken soup. Temperature discipline and patience during these initial steps determine whether your final bowl achieves restaurant-quality results or falls short of traditional standards.
Charred Aromatics & Spices: The Foundation of Authentic Flavor
I’ll start with the aromatics that give chicken pho its distinctive depth. For a 4–5 quart pot, you’ll need 1 large yellow onion and a 4-inch piece of fresh ginger. These two ingredients create the aromatic backbone that elevates your broth from ordinary to extraordinary.
Creating the Perfect Char
Charring your aromatics properly makes all the difference in developing complex flavors. I char my onion and ginger directly over a gas flame for 5–7 minutes, rotating them regularly to achieve even blackening on all sides. If you don’t have a gas stove, place them under your broiler for 10–15 minutes, turning occasionally until the skin is thoroughly blackened.
After charring, I always peel and scrape away the blackened skin before adding the aromatics to the pot. This removes any bitter compounds while preserving the sweet, caramelized flavors underneath. The charred ginger should reveal its golden flesh, while the charred onion layers peel away easily.
Selecting and Preparing Your Spice Blend
Chicken pho requires a simpler spice profile than its beef counterpart. I use these essential Vietnamese aromatics for authentic flavor:
- 2–3 whole star anise pods
- 4–5 whole cloves
- 1 cinnamon stick (3 inches long)
- 1 teaspoon coriander seeds (optional but recommended)
I dry-toast these pho spices in a pan over medium heat for 1–2 minutes until they become fragrant. Watch them carefully—burnt spices will make your broth bitter. The star anise should release its licorice aroma, while the cinnamon stick becomes visibly warmer in color.
Place your toasted spices in a mesh spice ball or wrap them in cheesecloth for easy removal later. This prevents small pieces from floating in your finished broth. I add these spices during the last 30–45 minutes of simmering to prevent overpowering the delicate chicken flavors.
Learning how to prepare rice noodles properly complements these aromatic foundations perfectly. The combination of properly charred aromatics and correctly toasted spices creates the authentic Vietnamese flavor profile that makes restaurant-quality pho achievable in your home kitchen.
Perfecting the Chicken and Noodles: Technique Matters
I always recommend using a whole chicken with bones for maximum flavor extraction. The bones contribute essential collagen and minerals that create the signature rich mouthfeel of authentic pho. Poach the entire chicken gently until the internal temperature reaches 165°F (74°C) at the thickest part of the thigh, which typically takes 45-60 minutes depending on the bird’s size.
Once the chicken reaches proper temperature, I immediately plunge it into an ice bath for 5-10 minutes. This crucial step stops the cooking process and firms up the skin, preventing the meat from becoming stringy or overcooked. After the chicken cools, carefully debone it and shred the meat into bite-sized pieces. Don’t discard those valuable bones — return them straight back to the pot to continue extracting every bit of flavor for your broth.
Rice Noodle Preparation: Fresh vs. Dried
The type of rice noodles you choose significantly impacts your final dish. Fresh noodles, known as bánh phở tươi, cook incredibly fast and require only 10-15 seconds of blanching in boiling water. These delicate noodles offer superior texture but have a shorter shelf life. For dried noodles (bánh phở khô), I recommend the Three Ladies Brand for consistent quality. Preparing rice noodles requires more patience — soak them in room temperature water for 20-30 minutes first, then boil for 3-5 minutes until they reach that perfect al dente texture.
Critical rule: never cook your noodles directly in the broth. Always use a separate pot to prevent starch from clouding your carefully crafted clear broth. I drain the cooked noodles thoroughly and portion them into individual bowls before ladling the hot broth over top. The heat from the broth will warm the noodles perfectly while maintaining the broth’s pristine clarity.
Timing becomes essential when serving. Have your rice noodles ready and shredded chicken portioned before you begin the final assembly. The noodles should go into bowls first, followed by the chicken, then the piping hot broth. This sequence ensures everything reaches the table at optimal temperature while preserving the distinct textures that make pho so satisfying.
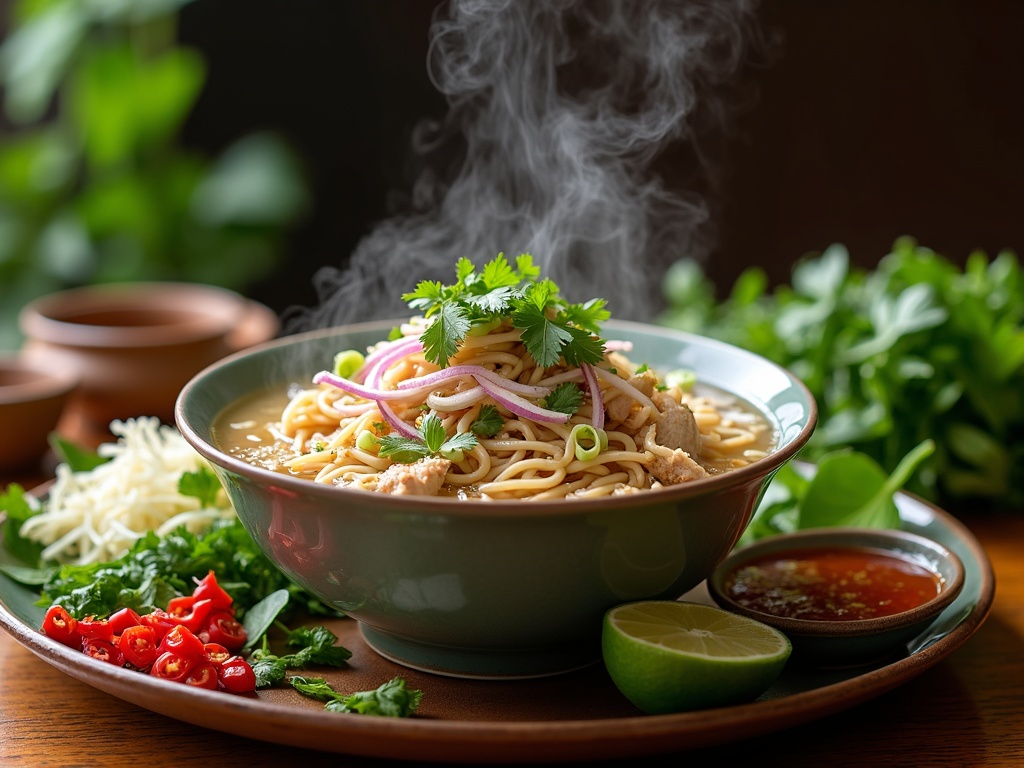
The Art of Assembly and Garnishing
Assembling chicken pho properly transforms simple ingredients into a harmonious bowl that delivers authentic Vietnamese flavors. I follow a specific sequence that ensures each component maintains its intended texture and temperature.
Essential Garnish Preparations
The standard garnish plate, known as đĩa rau thơm, forms the foundation of authentic pho service. I arrange fresh bean sprouts (giá đỗ), fragrant Thai basil (húng quế), and distinctive culantro or sawtooth coriander (ngò gai) alongside lime wedges (chanh) and thinly sliced bird’s eye chilies (ớt). Each herb contributes unique flavor notes – Thai basil adds sweet anise undertones, while culantro provides an intense, almost soap-like aroma that’s quintessential to Vietnamese cuisine.
For in-bowl additions, I prepare paper-thin slices of yellow or red onion, finely chopped cilantro, and freshly cut scallions. These ingredients require precise preparation since they’ll cook slightly from the hot broth’s heat.
Proper Assembly Technique
I start by placing pre-cooked rice noodles in a pre-warmed bowl to prevent temperature shock. Next, I arrange the shredded chicken over the noodles, followed by the sliced onions, scallions, and cilantro. The final step involves ladling boiling-hot broth directly over these ingredients.
Timing proves critical here – the broth must reach a rolling boil before ladling to properly cook the raw onion and wilt the fresh herbs. This technique creates the perfect balance between cooked and fresh elements that defines exceptional pho.
Condiment selection differs significantly from beef pho preparations. I recommend:
- Huy Fong Sriracha
- Lee Kum Kee Hoisin Sauce
Though I use these more sparingly with chicken pho than with beef variations. The delicate chicken flavor requires restraint to avoid overwhelming the subtle broth. Some regional variations include:
- Fried shallots
- Pickled garlic-chili vinegar
These add textural contrast and acidic brightness.
Understanding Vietnam’s pho culture helps appreciate why garnish placement matters so much. Each diner customizes their bowl according to personal preference, making the garnish plate an interactive element that enhances the dining experience. I always serve garnishes immediately after assembly to maintain their crispness and vibrant colors.
The combination of hot broth meeting fresh herbs creates aromatic steam that signals a properly assembled bowl. This visual and sensory cue indicates that all components have been integrated correctly, delivering the authentic pho experience that makes this dish so beloved worldwide.
Sources:
– The Heart of Vietnamese Phở Gà: Creating the Perfect Broth
– Charred Aromatics & Spices: The Foundation of Authentic Flavor
– Perfecting the Chicken and Noodles: Technique Matters
– The Art of Assembly and Garnishing